In today’s digital era, interior design is no longer just about hand-drawn sketches or imagination. Clients want to see how their space will look before a single brick is laid or a piece of furniture is placed. That’s where the 3D Rendering Process comes in and at BottomLine Studio, we specialize in transforming concepts into lifelike visuals that bring your vision to life.
If you’re curious about how the 3D Rendering Process works and why it’s a game-changer for interior design and architecture, you’re in the right place. In this blog, we’ll walk you through our step-by-step process and show you how BottomLine Studio sets the standard in delivering immersive 3D visuals in the USA and beyond.
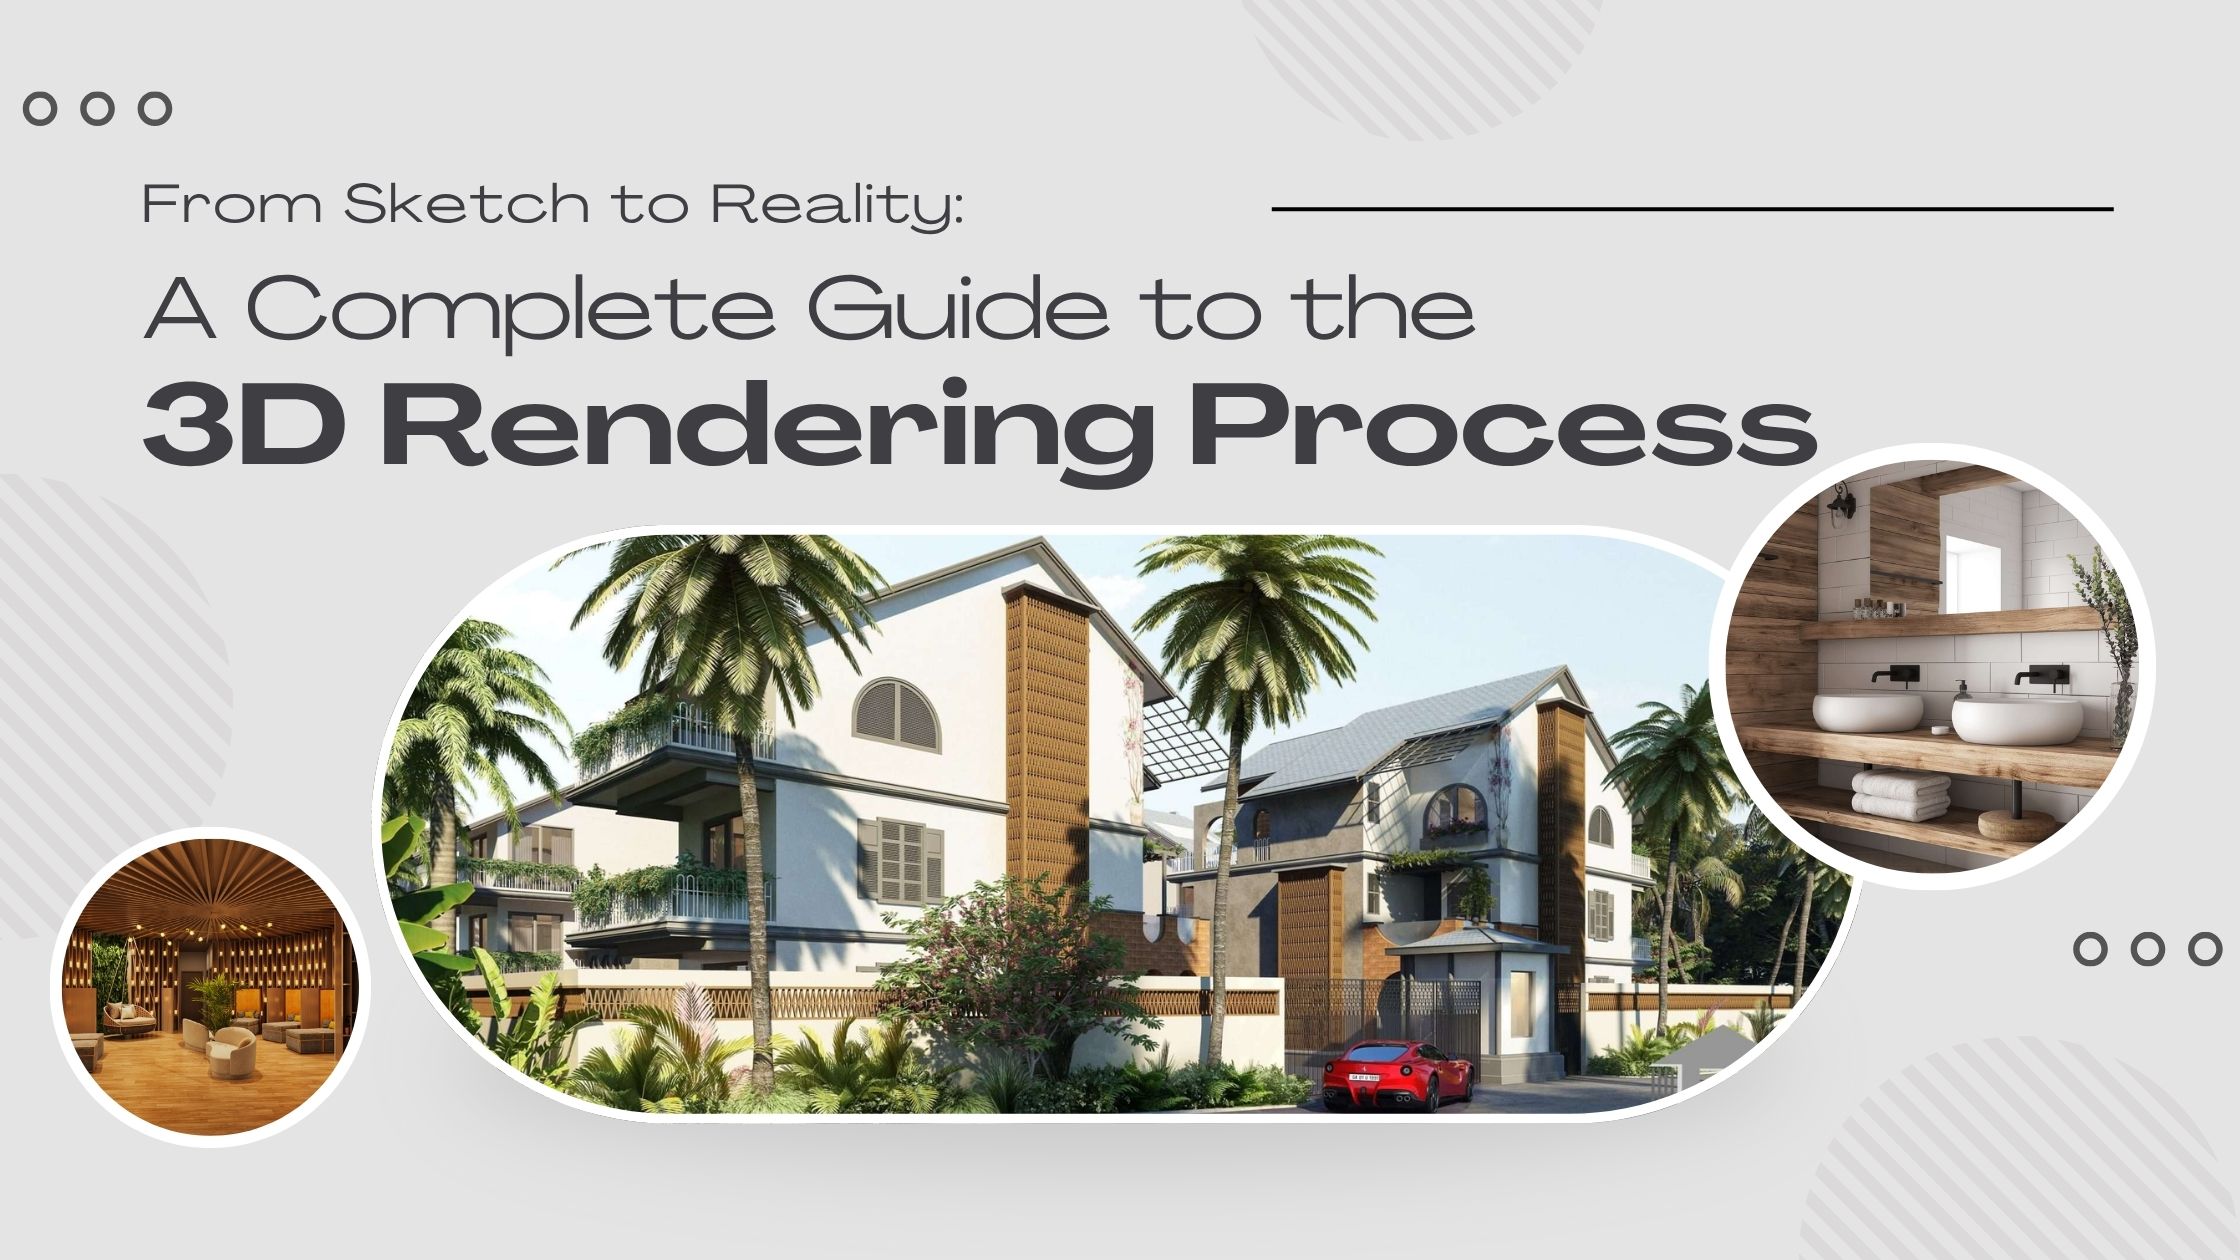
What is 3D Rendering?
Before diving into the process, let’s first understand what 3D Rendering actually is.
3D Rendering is the process of converting 3D models into 2D images that look incredibly realistic. It is used in interior design, architecture, real estate and product design to showcase how a concept or design will look in the real world.
This process involves creating digital 3D models, applying textures and lighting, and then rendering (producing) high-quality images or animations using specialized software. It’s a way of turning ideas into visuals that are easy to understand and emotionally engaging.

Common Uses of 3D Rendering:
- Interior design mockups
- Exterior architectural views
- Product presentations
- Real estate marketing
- Custom furniture visualizations
Think of 3D rendering as a bridge between design thinking and reality bringing your vision to life before construction begins.
What Is the 3D Rendering Process?
The 3D Rendering Process is a method of creating photorealistic images from 2D plans or sketches using specialized software. It involves modeling, texturing, lighting and rendering to create visuals that look like actual photos of the future space.
This technology allows clients to visualize every detail of their interiors from wall textures to furniture layout, lighting, colors and materials before the actual work begins.
Our Step-by-Step 3D Rendering Process at BottomLine Studio
At BottomLine Studio, we follow a carefully designed workflow to ensure every rendering is accurate, beautiful, and aligned with your goals. Here’s a behind-the-scenes look at how we work:
1. Client Discovery & Concept Understanding
Every successful rendering starts with a strong foundation. We begin with a comprehensive discussion to understand:
- Your space (residential or commercial)
- Your design goals and style preferences
- Mood boards or Pinterest inspirations
- Functional requirements
- Timeline and budget
Whether you’re a homeowner, builder, or business owner, this stage ensures we align with your vision.
2. 2D Layout Finalization
Before jumping into the third dimension, we first map the space in 2D. Our team uses CAD software to prepare detailed floor plans, which act as blueprints for space utilization, furniture layout, and room zoning. This step makes sure every square foot is accounted for and optimized.
3. 3D Modeling
Once the 2D plan is approved, we move into the 3D modeling stage using tools like SketchUp or 3ds Max. Here, we digitally sculpt the space including walls, ceilings, flooring, furniture, and fixtures to replicate the actual dimensions of your site. We recreate the design structure with extreme attention to scale and proportion.
4. Material & Texture Mapping
This is where the model starts looking real. We apply high-quality materials and textures—wood grains, marble veins, paint finishes, and fabric details to every element in the scene. Using real-world textures helps create accurate light interaction and realism in the final output.
5. Lighting Design & Setup
Lighting is a vital part of any space. We simulate both natural (sunlight, shadows) and artificial lighting (lamps, ceiling lights, LEDs) using V-Ray or Lumion. This step helps highlight how lighting will affect color, shadow, and mood in the actual space.
6. Rendering the Scene
Once everything is set up, we render the scenes using advanced rendering engines. This process converts the digital model into high-resolution images. The result? Photo-like visuals that showcase every angle, every material, and every beam of light. We usually provide multiple perspectives (top views, wide angles, close-ups) to give you a complete overview.
7. Post-Production & Final Enhancements
The final images are fine-tuned in post-production, where we adjust sharpness, brightness, contrast, and add any visual enhancements needed to achieve a magazine-like finish. We can even insert people, natural elements or branding into the image for added context.

Applications of 3D Rendering in Real Projects
At BottomLine Studio, we’ve worked across a wide range of industries:
Residential Interiors
- Living rooms, bedrooms, kitchens, bathrooms
- Villas, apartments, penthouses in USA prime locations
Commercial Spaces
- Offices, showrooms, retail outlets, salons
- Functional layouts designed for productivity and brand identity
Hospitality Design
- Restaurants, cafes, boutique hotels
- Designs focused on ambiance and guest experience
Custom Furniture Rendering
We help clients visualize furniture pieces before production saving material costs and ensuring perfect proportions.
Conclusion
The 3D Rendering Process is more than just a technical step, it’s the bridge between your imagination and the final result. At BottomLine Studio, we take pride in delivering detailed, realistic, and stunning 3D visuals that empower you to make confident design decisions. Whether you’re building a luxury villa, a stylish office, or a functional commercial space, our team ensures that your design journey is smooth, efficient and truly satisfying.
Q1: What is the average time to complete a 3D rendering?
It usually takes 3–7 days, depending on the size and complexity of the project.
Q2: What software do you use?
We commonly use 3ds Max, SketchUp, Lumion, V-Ray, and Photoshop for high-end rendering results.
Q3: Can 3D rendering help in real estate sales?
Yes, 3D architectural visualization is a powerful tool for real estate marketing, helping buyers understand layout, lighting, and space utilization before construction finishes.