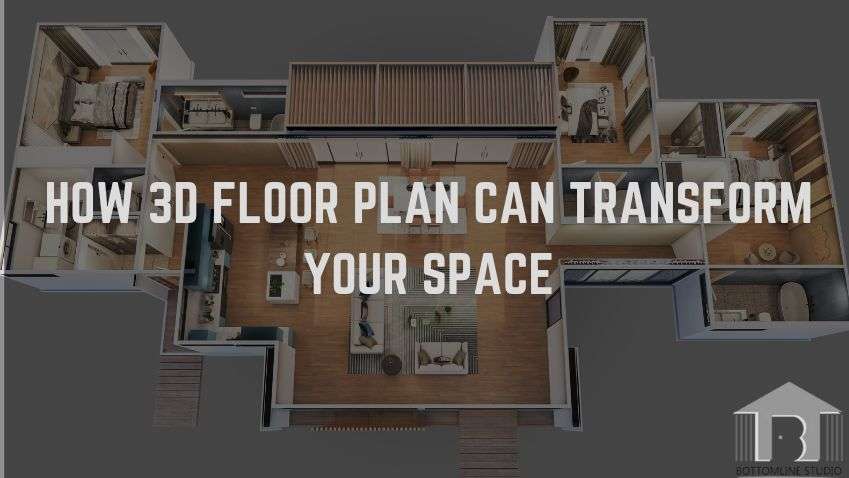
3D floor plan representation is an entirely new realm imparted into planning your space. Through realistic and detailed 3D floor plan rendering, you can delve into various design options. You can experiment with colors and materials— allowing you to envision how your space will appear in reality. 3D Floor Plan rendering can transform your plan into breathtaking actualities.
Rendering floor plans can be seen as completely changing the way you look at your design process. What would be the point of settling for guessing and being unsure when you can see your ideas visually, to realize them afterwards? Decide today to take advantage of 3D Rendering and actualize it by creating spaces that are at par with real-world requirements. This blog will help you decide on what steps to take to bring the vision you have in mind to reality.
What is Rendering and Why is it Important for 3D Floor Plan
The process of constructing an image or an animation of an object by using a three-dimensional model is called rendering. When referring to floor plans, rendering implies the process of converting a black-and-white layout into a color image that communicates the true image and feel of the interior.
In the case of floor plans, it is crucial just as colors are to painting. It helps the designers and clients envision the space from different angles, and try various concepts. This saves their precious time and effort in deciding on layout choices, materials, and finishes. They also assist in determining areas of design that may be weak as compared to 2D drawings.
A variety of people, including designers, clients, and other interested parties, can get a feel for the space with the help of 3D Floor Plans. Rendering floor plans brings together all the creative parts of the work or project. Moreover, it provides a biological link to reality to all people so they to see the final result.
Benefits of 3D Floor Plan Rendering

3D rendering floor plans have numerous advantages that can improve the design phase and the outcome in a significant way. Let’s explore some of these benefits in detail:
Enhanced Visualization
When it comes to 3D floor plans, enables people to provide their concepts and the goals they envision in the areas in rooms. From this perspective, techniques like rendering tell you everything you need to know about your design. This aids in decision-making throughout the process and keeps the final functionality a true reflection of your desired design.
Design Exploration
One can twist and sculpt the layout, have many variations of a color scheme, and select the various types of material. These let you expand the choices while making them accessible. You will have a wider range of options. This will assist you in choosing the design that can meet an individual’s preferences or needs.
Improved Communication
It is helpful to visually depict floor plans to clearly explain your concepts to the client. You can provide them even a life-like and enlarged picture rather than mere telling or sketch drawings of words and images. This eliminates confusion in the project and guarantees that everyone knows the design intent.
Cost and Time Savings
3D rendering of floor plans is particularly beneficial in the construction phase. It enables architects to identify possible design errors or challenges in the detailed layout of the planned structure before construction commences. It also enables early detection and prevention of such occurrences. This saves time as well as other resources that could have been expended in trying to streamline the activities of the perpetrators of the error.
Marketing and Sales
As mentioned previously, plans provide a clear depiction of the appearance of a certain floor. This leads to them becoming an effective marketing instrument. In this way, it is possible to inspire their interest and develop positive emotions. This helps viewers to see more attractive and convincing images. Therefore, you will have the prospects to sell more or rent.
Also Read: The Impact of 3D Floor Planning on Commercial Spaces
Step-by-Step Process of Rendering a Floor Plan
Now that you have chosen the right rendering software, let’s walk through the step-by-step process of rendering a floor plan:
Prepare the 3D Model

To begin with, make sure you have a 3D model of your floor plan created by any design application you prefer. Before creating the elevation, ensure that you have the correct dimensions, the type of furniture, and other designs. This will form the base of your render when writing the report.
Lighting and materials

You should then consider the lighting and material that you need. Reflect on the type of light you want to create. Regulate the brightness and light flow in the direction needed. Spread fabrics on floors, walls, furniture, and other related areas with the intent of creating or acquiring some specific texture.
Adjust Camera Settings

Maneuver the camera in the scene to take close, distant, upward, downwards, or sideways views as per the requirement. Exposure control over the focal length and depth of field enables the photographer to narrow down the vision to the required outcome. Try to take pictures in various positions, particularly concerning the orientation regarding the subject.
Render the Image

After ensuring the position of the light sources, the type of material, and the camera settings you want to capture, it is now time to produce or display the image. Depending on how complex your scene is and what rendering software you are using, it could take you some time to do this. Let it go through the motions and let the software take its course.
Post-Processing

When the image is complete it can be shaded or rendered. It depends on the kind of post-processing needs of the image. This may entail altering the light levels and contrast, blurring the background, or putting on filters to bring out a particular mode. Based on the unsatisfactory outcome of the first attempt, try out other treatments to arrive at the desired outcome.
Present and Share

Last but not least, display your rendered floor plan to clients, investors, or anybody interested in the establishment. Finally, employ the images to reach out about your design ideas and express how the space could be. For instance, you can work on presentations to share the materials. You can also create digital portfolios to display the 3D Floor Plan.
If you’re looking to create stunning and realistic 3D floor plans, check out 3D Rendering Floor Plan Services. They can help bring your vision to life with professional and detailed renders.
Tips for Creating Realistic 3D Rendering Floor Plans
Developing these images involves paying attention to a lot of details and staying as close to detailed realism as possible while also making the images pleasant to look at. Here are some tips to help you achieve the best results:
Pay Attention to Lighting
It is very important to pay special attention to the lighting to get a very realistic picture. Observe the directness of the light sources and hue on the subjects being illuminated. Follow several trials and test differing scenes. You must also work on various kinds of lighting, to construct the required light outlook.
Textures and material
It is crucial to be keen on the textures and the materials. This will ensure that their appearance closely resembles that of real life. It is advised that high-resolution textures should be used. Furthermore, it should be properly applied to the model to make the model appear realistic.
Experiment with Camera Angles
The size and eye of the lens should be changed from time to time. Search for numerous perspectives on what you want to take a photograph of to capture the best angle that is artistic. The position of objects in a scene and depth of field are used for achieving depth in vision.
Add Context and Details
Applying shocks of context and details can be useful in the process of making the 3d-floor plan realistic. Therefore, it makes the 3d rendering of floor plans more aesthetically pleasing. Add more of the scene including trees, furniture, or individuals to give a perception that it is alive and has life within it. Aim at inserting reflections, shadows textures, and other less noticeable elements to make the picture more profound and realistic.
Conclusion
Rendering floor plans is a revolutionary step that has been highly accredited in the field of architecture and design. It enables the development of plans, decision-making, and execution of ideas while prioritizing the value and use of the given space. The advantages are apparent both in visualization and in being able to explore spatial designs more thoroughly, in giving a clearer message to the other people involved as well as in the matter of having fewer costs in comparison to other rendering methods.
Therefore, selecting the right rendering software, executing the scene in a professional approach, and applying various principles will enable you to create stunning and realistic renderings that can conquer the audience and change the overall landscape of your space.